
Radiator Fluid Leak from Engine: How to Fix It?
Posted on March 19, 2025

Have you noticed a suspicious puddle of green, pink, or another colored liquid beneath your car? This is often an early sign of radiator fluid leaking—from the engine block, the front, or even the back of the engine.
A car radiator fluid leaking issue can lead to engine overheating and, in some cases, even allow transmission fluid to mix with your coolant. If you're wondering how to fix a radiator fluid leak or how to fix the radiator leaking transmission fluid, you're in the right place.
Replacing a faulty radiator is typically an expensive repair. Fortunately, many are turning to radiator fluid stop leak products as a more affordable alternative. But how effective are these stop leak solutions, and can they truly serve as a lasting radiator fluid leak fix?
In this blog post, we’ll explore practical steps and proven techniques—from understanding how to stop transmission fluid from leaking into the radiator to addressing leaking radiator fluid issues at various engine points.
Our goal is to provide you with clear, professional advice that’s friendly and accessible, ensuring you’re well-equipped to tackle any radiator fluid leak, no matter where it’s coming from.

Warning Signs of a Car Radiator Fluid Leaking
Detecting a radiator fluid leak early can help prevent costly repairs and engine damage. Here are some warning signs that your vehicle may be leaking coolant and in need of attention:
1. Temperature Gauge Rising
If your engine is overheating, the temperature gauge will rise toward the red zone, indicating a problem. Some cars have a red warning light that illuminates when the engine is already overheating. If you notice either of these signs, it’s crucial to stop driving and let the engine cool down.
2. Broken Heat or No Heat
One early warning of a radiator fluid leaking is a lack of heat inside your vehicle. The heater core relies on coolant to operate, so a drop in coolant levels may prevent it from providing heat. If your heater isn’t working properly, it could be a sign of a leak in the cooling system.

3. Steam or Smoke Coming from the Engine Area
Steam or smoke coming from the hood is a clear sign of a coolant leak. This occurs when the radiator leaks due to excessive pressure, causing hot coolant to escape as steam. If you see this, pull over immediately and allow the engine to cool before inspecting further.
4. Puddle of Fluid Beneath the Car
A puddle of liquid under your car is a common sign of a radiator leak. The fluid is often bright green, though this can vary depending on the type of antifreeze used. If you spot a pool of liquid, it's important to check for a leak.

5. Low Coolant Levels
If you're unable to find a puddle beneath your car, check your radiator’s reservoir tank for low coolant levels. The reservoir will have markings indicating hot and cold levels. If the coolant is much lower than it should be, there’s likely a leak in the system.
6. Sweet Smell Coming from the Engine Area
Antifreeze has a distinct sweet smell. If you notice a sweet odor near your engine, it could be a sign of a coolant leak. If you detect this scent, it’s best to have your vehicle checked out right away to prevent further damage.
If you notice any of these warning signs, you need to address the issue promptly to avoid engine damage and costly repairs.

7. Rust or Discoloration on the Radiator
Inspecting your radiator for rust or discoloration is another way to spot a coolant leak. If the radiator’s surface is corroded or there’s evidence of liquid buildup, it may indicate a slow leak.
The presence of rust around the radiator or hoses could also point to a long-standing leak that’s caused damage to your vehicle’s cooling system.
8. Warning Light
Many modern vehicles are equipped with a warning light that will illuminate when there’s an issue with the engine’s cooling system. If the coolant levels drop too low or the system malfunctions, the warning light will turn on to alert you. Don’t ignore this light—addressing the issue right away can save you from further damage.

Common Causes of Radiator Fluid Leaks
Here are some common causes of radiator fluid leaks that you should watch out for to keep your radiator in good condition:
1. Corrosion and Rust
Corrosion and rust are the leading causes of radiator leaks, primarily due to prolonged exposure to heat and pressure. Over time, these factors weaken the radiator’s metal, causing cracks and eventually holes to form.
Once this happens, coolant escapes, reducing the system’s ability to regulate the engine’s temperature effectively.

2. Faulty Radiator Gasket
The radiator gasket plays a crucial role in sealing the connection between the radiator and the coolant tank.
If the gasket wears out or becomes damaged, coolant can escape rapidly, leading to a drop in fluid levels and causing the engine to overheat. This is a critical part of the cooling system that should be replaced by a professional to prevent further damage.
3. Worn Radiator Cap
The radiator cap helps seal the cooling system, keeping coolant inside and preventing contaminants from entering. Over time, heat and pressure can wear down the cap, causing it to malfunction.
While a worn cap may not always cause immediate leaks, it’s essential to inspect or replace it during routine maintenance to avoid potential issues.

4. Poor Service Practices
Improper maintenance practices can contribute to radiator issues. For instance, overfilling the radiator can result in excessive pressure, which can cause leaks. Be mindful of how your radiator is serviced to avoid practices that could compromise its integrity.
5. Malfunctioning Water Pump
If coolant is leaking from the bottom of your radiator, a malfunctioning water pump could be the culprit. The pump, located near the bottom of the radiator, circulates coolant through the system.
It may be damaged by debris or rough driving, or the hoses connected to it could become disconnected or torn, leading to leaks.

6. Cracked Reservoir
The coolant reservoir, which holds the radiator fluid that cools the engine, is also susceptible to wear and tear.
A crack in the reservoir can cause coolant to leak, reducing the amount of fluid available for the cooling system to operate effectively. Regularly checking the reservoir for cracks can help prevent this issue.

How to Fix Radiator Fluid Leak?
If you've discovered a radiator fluid leak, you need to fix it promptly to prevent further damage to your engine. Depending on the severity of the leak, there are a few different ways to address the issue. Here are steps you can take to fix a radiator fluid leak, from quick temporary fixes to more permanent solutions.

1. Identify the Source of the Leak
Finding the leak’s origin is essential for an effective repair, as various causes require different approaches. There are two reliable methods for locating a radiator leak: conducting a visual inspection and using a coolant system pressure tester.
Both techniques can help you identify the issue, so you can choose the best solution for a lasting fix.
Visual Inspection
The first step in finding a radiator fluid leak is to conduct a thorough visual inspection of the radiator and surrounding components. Look for:
- Damage or corrosion on the radiator
- Wear or corrosion on the radiator cap
- Cracked, worn, or damaged hoses and connections
Be cautious when inspecting the radiator, as hot coolant could be spraying from the leak. Always wear safety gear during this process.
If you can’t find the leak visually, don’t worry. A coolant system pressure tester can help you pinpoint the source with more accuracy.

Using a Coolant System Pressure Tester
If you’re losing coolant but can’t spot a leak, a coolant pressure test can help. This tool lets you check the pressure in your cooling system, and if it’s low, there’s likely a leak somewhere.
- Ensure the Engine Is Cool: Make sure the engine is completely cool to avoid burns while working with the radiator.
- Remove the Radiator Cap: Carefully remove the radiator cap to release any built-up pressure.
- Attach the Pressure Tester: Connect the pressure tester to the radiator or reservoir, ensuring a tight seal.
- Pressurize the System: Pump the tester to the pressure recommended by your vehicle, usually between 15 to 20 psi.
- Check for Leaks: Watch the gauge for any pressure drop, which indicates a leak. Inspect the hoses, radiator, and engine for visible leaks.
- Release the Pressure: After the test, carefully release the pressure before disconnecting the tester.
If you find any leaks, fix them right away to prevent overheating or engine damage.

2. Gather the Necessary Tools and Parts
Once you’ve identified the leak, gather the necessary tools and parts. Common tools include a wrench set, screwdrivers, pliers, a drain pan, and possibly a radiator pressure tester.
For parts, ensure you have replacements that match your vehicle’s make and model, such as hoses, a radiator repair kit (for small cracks), or new clamps if needed.
It’s also wise to have extra coolant on hand to refill the system after the repair. Always use the correct coolant type for your vehicle.
Prioritize safety by wearing gloves and safety glasses, and ensure your workspace is well-lit. Check your vehicle’s service manual for specific details about the cooling system and repair instructions before you start.

3. Drain the Coolant
Before repairing the cooling system, you’ll need to drain the coolant. Start by ensuring the engine is cool to prevent burns. Place a drain pan under the radiator’s drain valve (usually at the bottom), then slowly open the valve to let the coolant flow. If there’s no valve, remove the lower radiator hose to drain it.
As the coolant drains, check its condition. Clean, bright coolant means the system is in good shape, while discolored or rusty coolant may indicate internal issues. Once drained, close the valve or reattach the hose and dispose of the coolant properly at a recycling center.
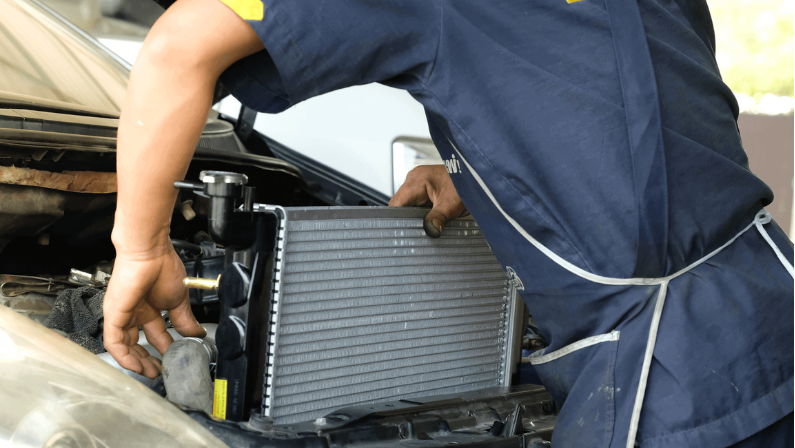
4. Repair or Replace the Damaged Component
Once the coolant is drained and the leak is found, it's time to repair or replace the damaged part. Here’s what to do based on the type of leak:
- Replacing a Radiator Hose: Loosen the clamps on both ends of the hose and remove it. Inspect for cracks or bulges, then replace with a new hose, securing it with fresh clamps.
- Repairing a Radiator: For small cracks, use a radiator repair kit with epoxy to seal the hole. For larger damage, replace the radiator entirely.
- Tightening Clamps and Connections: Check all hose connections and clamps. Tighten loose ones and replace any corroded or broken clamps.
- Water Pump or Engine Gasket Leaks: Leaks from these parts are complex and may need professional help for proper repair or replacement.

5. Refill and Bleed the Cooling System
Mix the correct ratio of coolant and distilled water as recommended by your vehicle’s manufacturer. Slowly pour it into the radiator or reservoir, checking the level until it reaches the fill line. Start the engine, let it run for a few minutes, then recheck the coolant level and top off if needed.
To remove air pockets, open the bleed valve near the thermostat or run the engine with the radiator cap off, being careful of hot coolant.
Monitor the coolant level and temperature over the next few days to ensure proper function and check for leaks or overheating. This helps keep your engine running smoothly and prevents future issues.
6. Effective Radiator Leak Repair Solutions
Once you’ve identified the cause of your radiator leak, it’s time to choose the best repair solution. In this section, we’ll go over different methods, including commercial leak sealants, radiator epoxy, and professional repairs.
Each option has its pros and cons, so it’s important to select the one that fits your needs. Commercial leak sealants are a popular and easy-to-apply choice for fixing radiator leaks.

Maintenance Tips to Prevent Radiator Leaks
To prevent radiator leaks and keep your engine running smoothly, regular maintenance is essential. By following these simple tips, you can extend the life of your radiator and avoid costly repairs.
1. Regular Inspections
Regularly inspecting your radiator and cooling system can help catch any potential issues early. Look for signs of leaks, corrosion, or wear and tear, especially around the radiator hoses, cap, and coolant reservoir. Catching these problems early can prevent bigger issues down the road.
2. Coolant Flush and Replacement
Over time, coolant can become contaminated or lose its effectiveness. Performing a coolant flush and replacing it at regular intervals—usually every 2 to 3 years—helps maintain optimal engine temperature and prevents rust or scale buildup inside the radiator.
3. Inspecting and Replacing Radiator Caps
The radiator cap plays a vital role in maintaining proper pressure within the cooling system. Over time, it can wear out or become damaged. Inspect the cap regularly for cracks or signs of wear and replace it if necessary to prevent coolant leaks and overheating.
4. Keeping Your Cooling System Clean
Debris, dirt, and sediment can accumulate in the radiator and cooling system, potentially leading to blockages or poor heat dissipation. Ensure the cooling system is kept clean by flushing it periodically and removing any debris that may build up on or around the radiator.
By staying on top of these maintenance tasks, you can keep your radiator in top shape and avoid the hassle of leaks and costly repairs.

Radiator Troubles? Trust the Team You Know at CarHub North York Chrysler
A radiator fluid leak can quickly escalate into a more serious issue if not addressed promptly. At CarHub North York Chrysler, we understand that staying proactive with your cooling system maintenance is essential to keeping your engine running smoothly and avoiding costly repairs.
Our experienced technicians are dedicated to providing expert service and personalized care for every vehicle. From diagnosing a simple radiator fluid leak to handling more complex issues, we’re here to ensure your car receives the best care possible.
For additional car care tips and maintenance advice, be sure to visit our Blog page. And when it’s time for professional assistance with your radiator or any other auto service, trust the team at CarHub North York Chrysler. Stop by today, and let us help keep your ride performing at its best!